> ## Documentation Index
> Fetch the complete documentation index at: https://docs.openmic.ai/llms.txt
> Use this file to discover all available pages before exploring further.
# Schedule Outbound Campaign
> Learn how to dial a list of contacts from CSV using OpenMic campaigns to run AI-powered outbound calling campaigns
Running AI-powered outbound calling campaigns has never been easier. With OpenMic, you can create a voice agent, upload your contacts, and run personalized campaigns in just a few steps. In this guide, we'll walk through the entire process — from signup to monitoring call logs.
## 1. Sign Up for OpenMic
Head over to OpenMic and create your account. Once you're signed in, you'll have access to the **dashboard**, where you can create and manage your agents and campaigns.
## 2. Create a New Agent
* Go to the **Agents** section and click **Create New Agent**.
* Fill in the **agent settings** (such as name, voice, and any other configurations).
When writing the **Agent Script**, you can use **dynamic variables** like:
* `{{name}}`
* `{{address}}`
* `{{Account Id}}`
These placeholders will automatically pull values from your uploaded contact list. Just make sure your CSV file has **headers that match these variable names** (case sensitive).
## 3. Upload Your Contact List
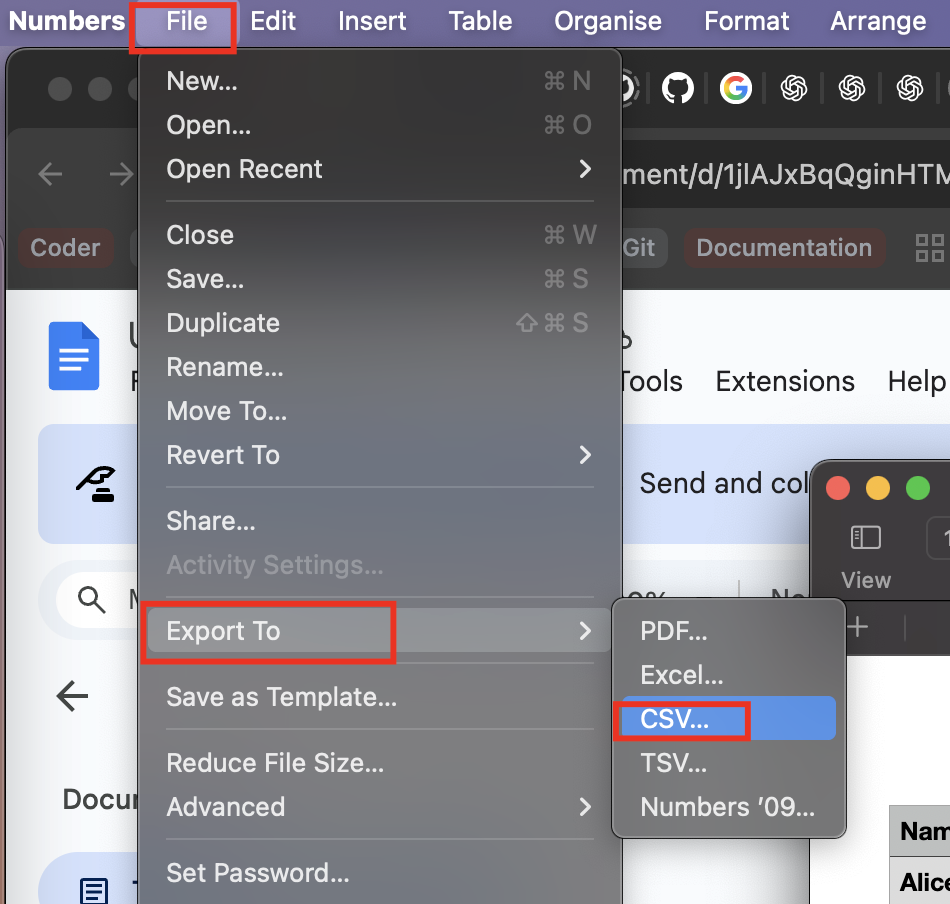
1. Prepare your sheet like this and export it as CSV.
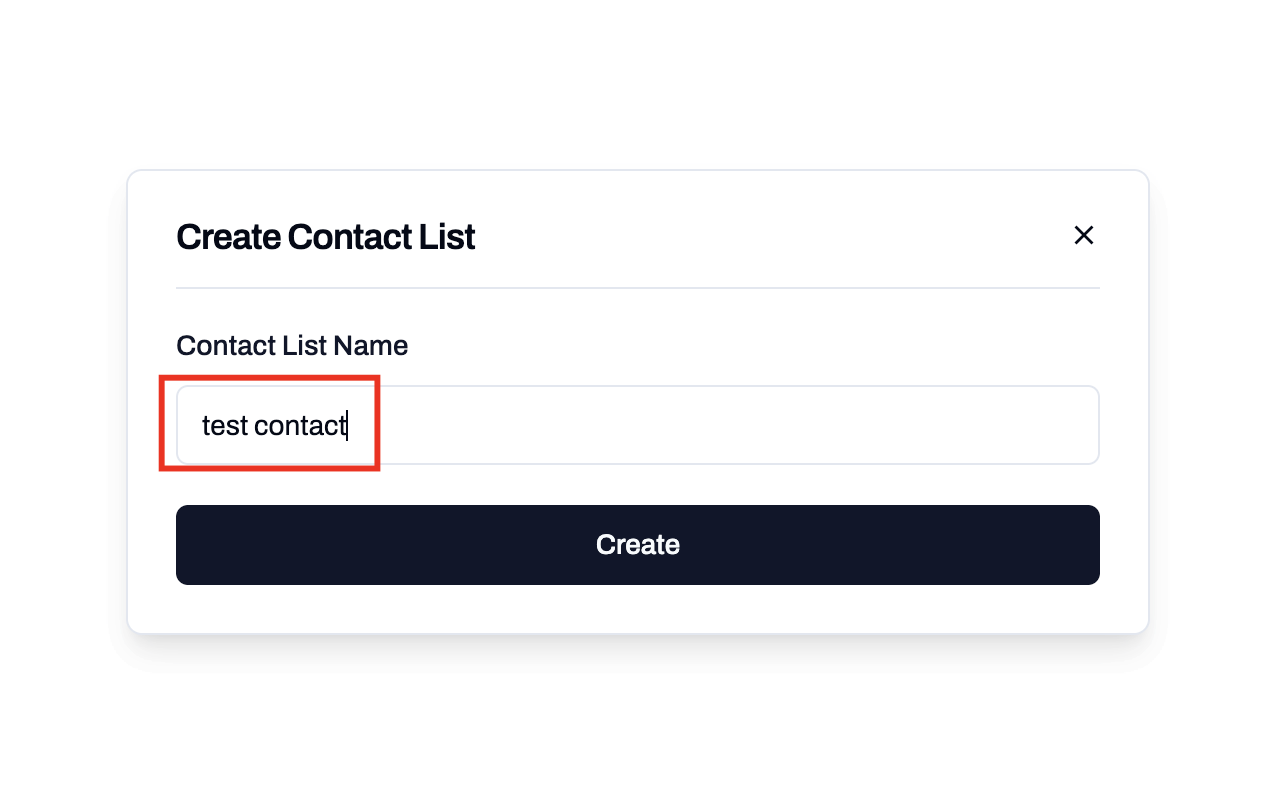
 2. Navigate to **Contacts → Create New List**.
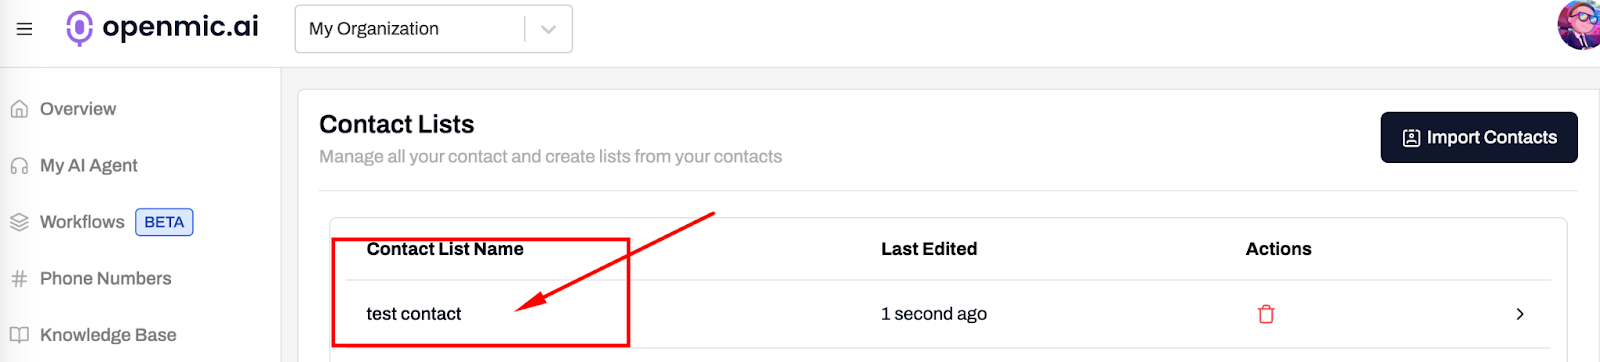
 3. Once your list is created, open it and click **Upload CSV**.
4. Upload your CSV file.
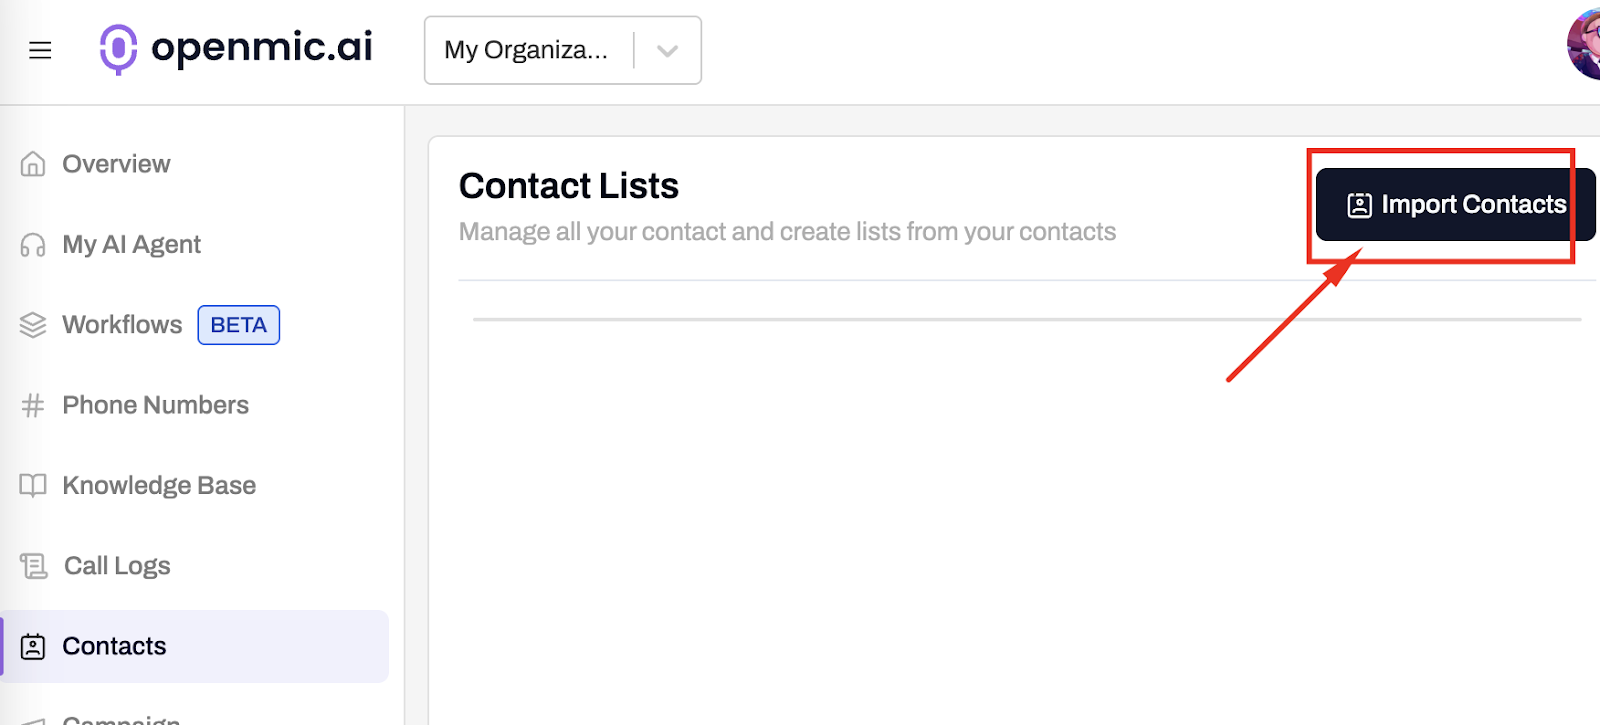
3. Once your list is created, open it and click **Upload CSV**.
4. Upload your CSV file.
 5. **Map the fields**:
* Ensure **Name** and **Phone Number** are correctly mapped.
* Any additional headers (like address or Account Id) will automatically align with the variables in your script.
5. **Map the fields**:
* Ensure **Name** and **Phone Number** are correctly mapped.
* Any additional headers (like address or Account Id) will automatically align with the variables in your script.
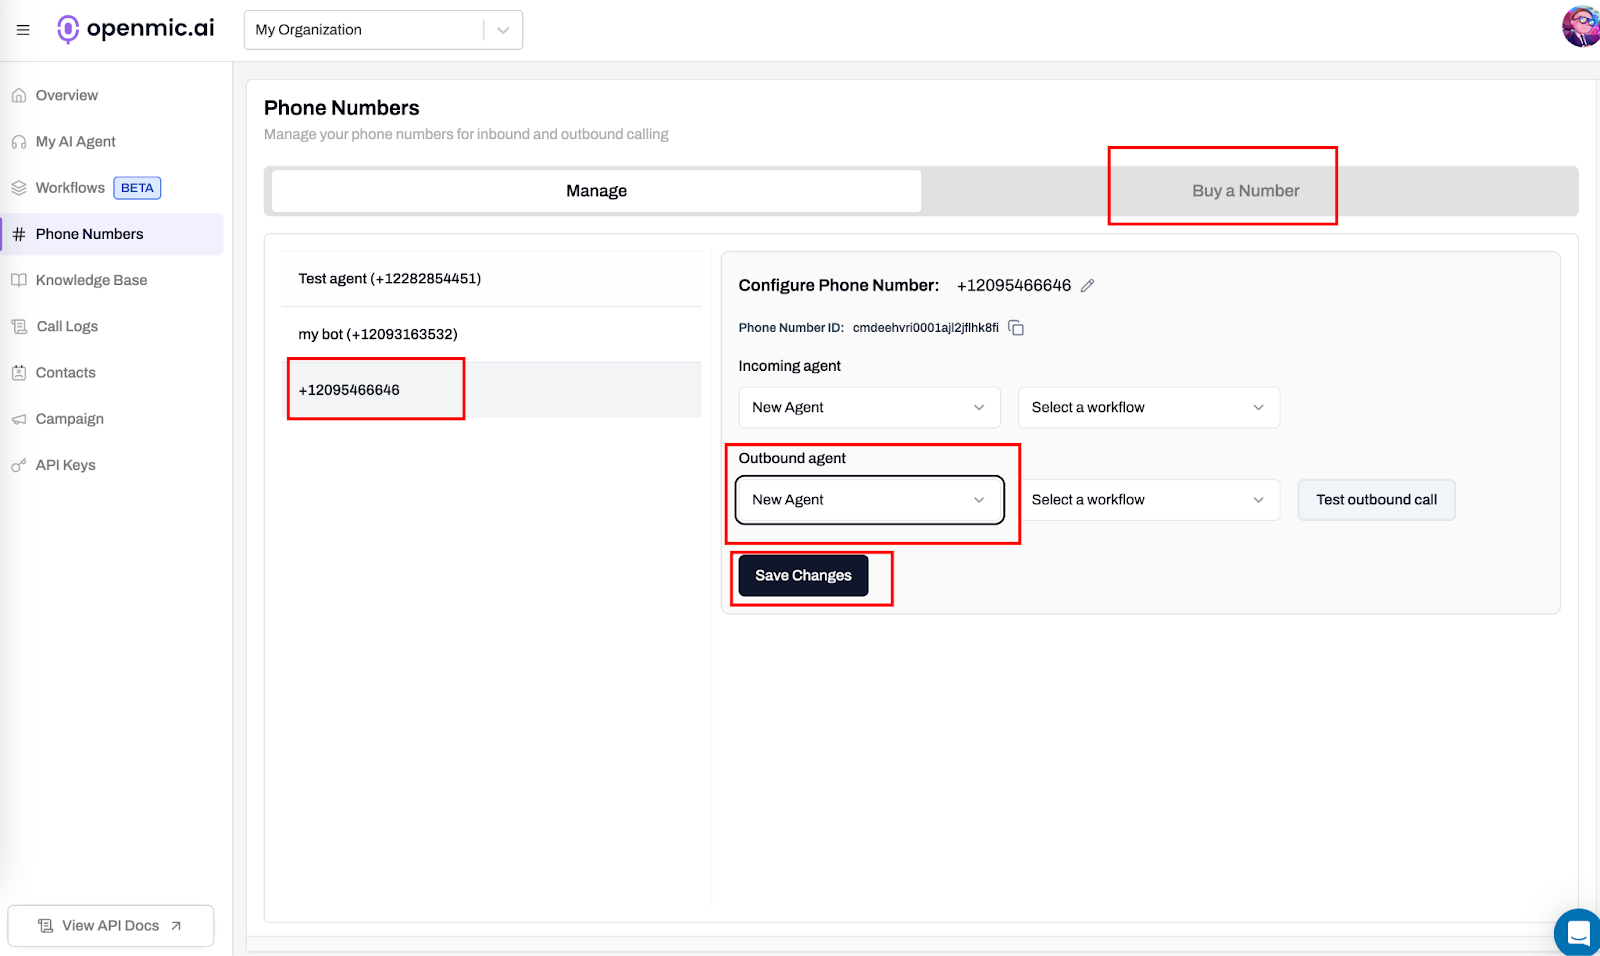
 ## 4. Buy a Phone Number and Link Agent
Buy a Phone number and link your agent as outbound agent.
## 4. Buy a Phone Number and Link Agent
Buy a Phone number and link your agent as outbound agent.
 ## 5. Create a Campaign
Now that your agent and contact list are ready:
1. Go to the **Campaigns** section.
2. Click **Create New Campaign**.
## 5. Create a Campaign
Now that your agent and contact list are ready:
1. Go to the **Campaigns** section.
2. Click **Create New Campaign**.
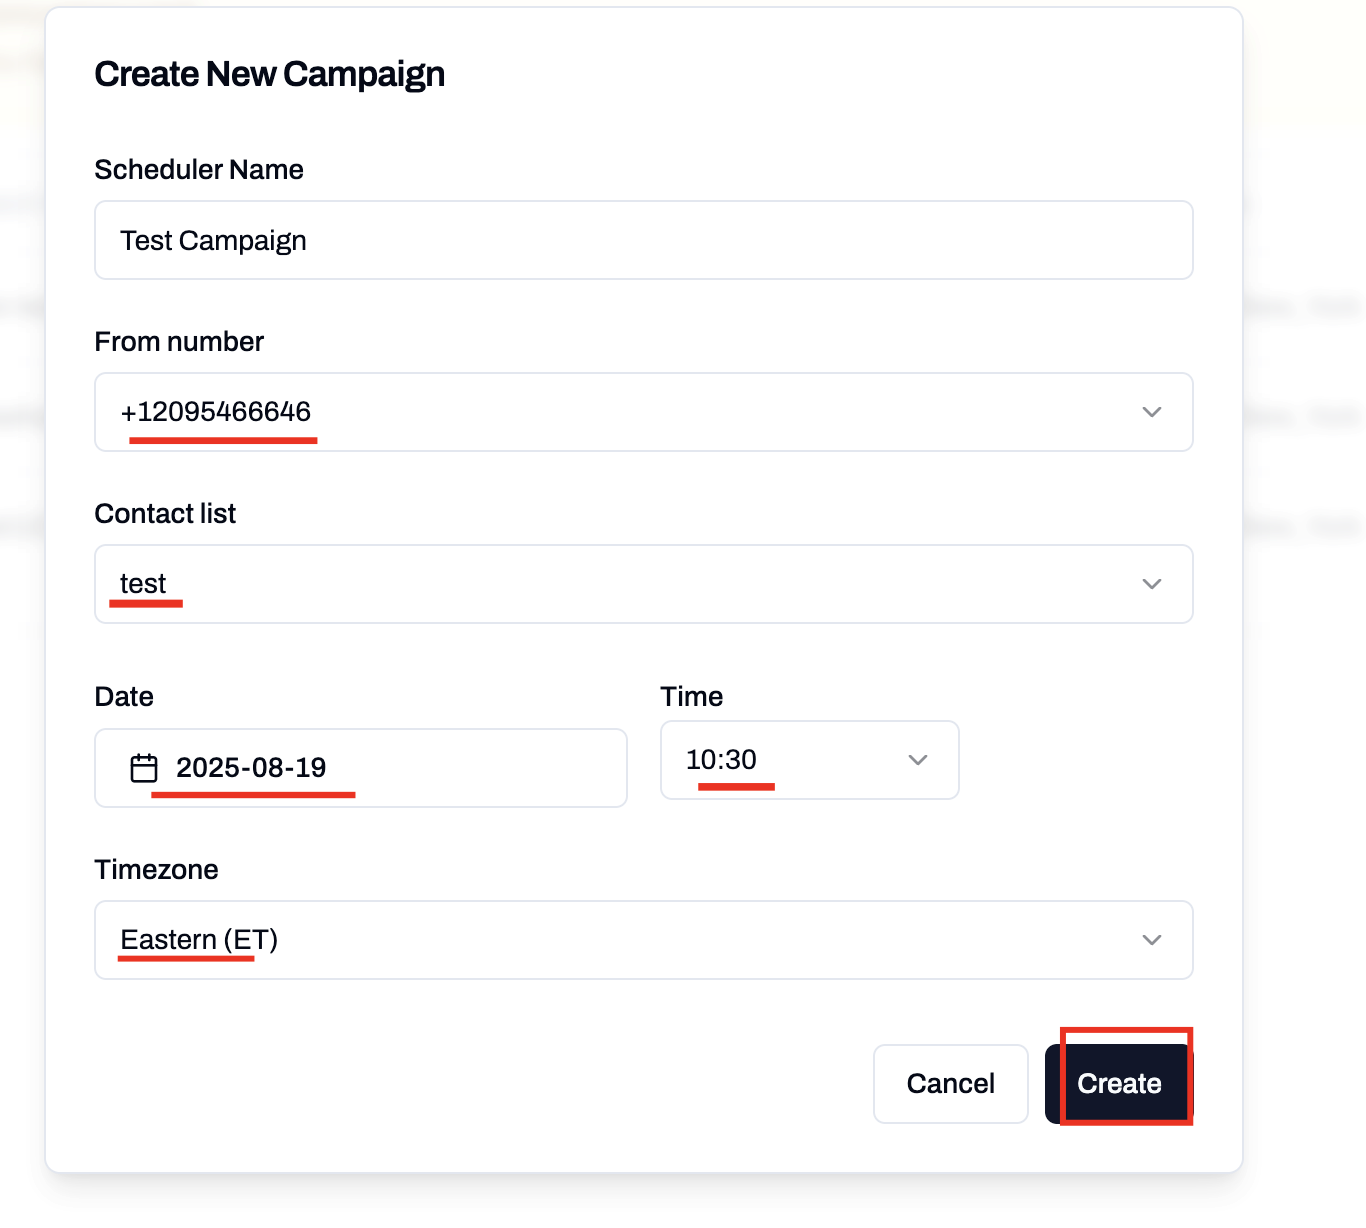 3. Select:
* The **Agent** you just created.
* The **Contact List** you uploaded.
* The **Phone Number** from which calls will originate.
4. Choose your campaign schedule type:
* **Single Run**: Schedule a one-time campaign for a specific date and time.
* **Multi Run**: Set up a recurring campaign that runs on multiple days of the week.
### Multi Run Campaign
For campaigns that need to run on multiple days (e.g., Monday through Friday), use the **Multi Run** option:
1. Click on the **Multi Run** tab in the campaign creation form.
2. Enter a **Scheduler Name** to identify your recurring campaign.
3. **Select the days of the week** when the campaign should be active (e.g., Monday through Friday).
4. Set the **Start Time** and **End Time** for each day (e.g., 08:30 to 17:00).
5. Select the appropriate **Timezone** for your campaign.
3. Select:
* The **Agent** you just created.
* The **Contact List** you uploaded.
* The **Phone Number** from which calls will originate.
4. Choose your campaign schedule type:
* **Single Run**: Schedule a one-time campaign for a specific date and time.
* **Multi Run**: Set up a recurring campaign that runs on multiple days of the week.
### Multi Run Campaign
For campaigns that need to run on multiple days (e.g., Monday through Friday), use the **Multi Run** option:
1. Click on the **Multi Run** tab in the campaign creation form.
2. Enter a **Scheduler Name** to identify your recurring campaign.
3. **Select the days of the week** when the campaign should be active (e.g., Monday through Friday).
4. Set the **Start Time** and **End Time** for each day (e.g., 08:30 to 17:00).
5. Select the appropriate **Timezone** for your campaign.
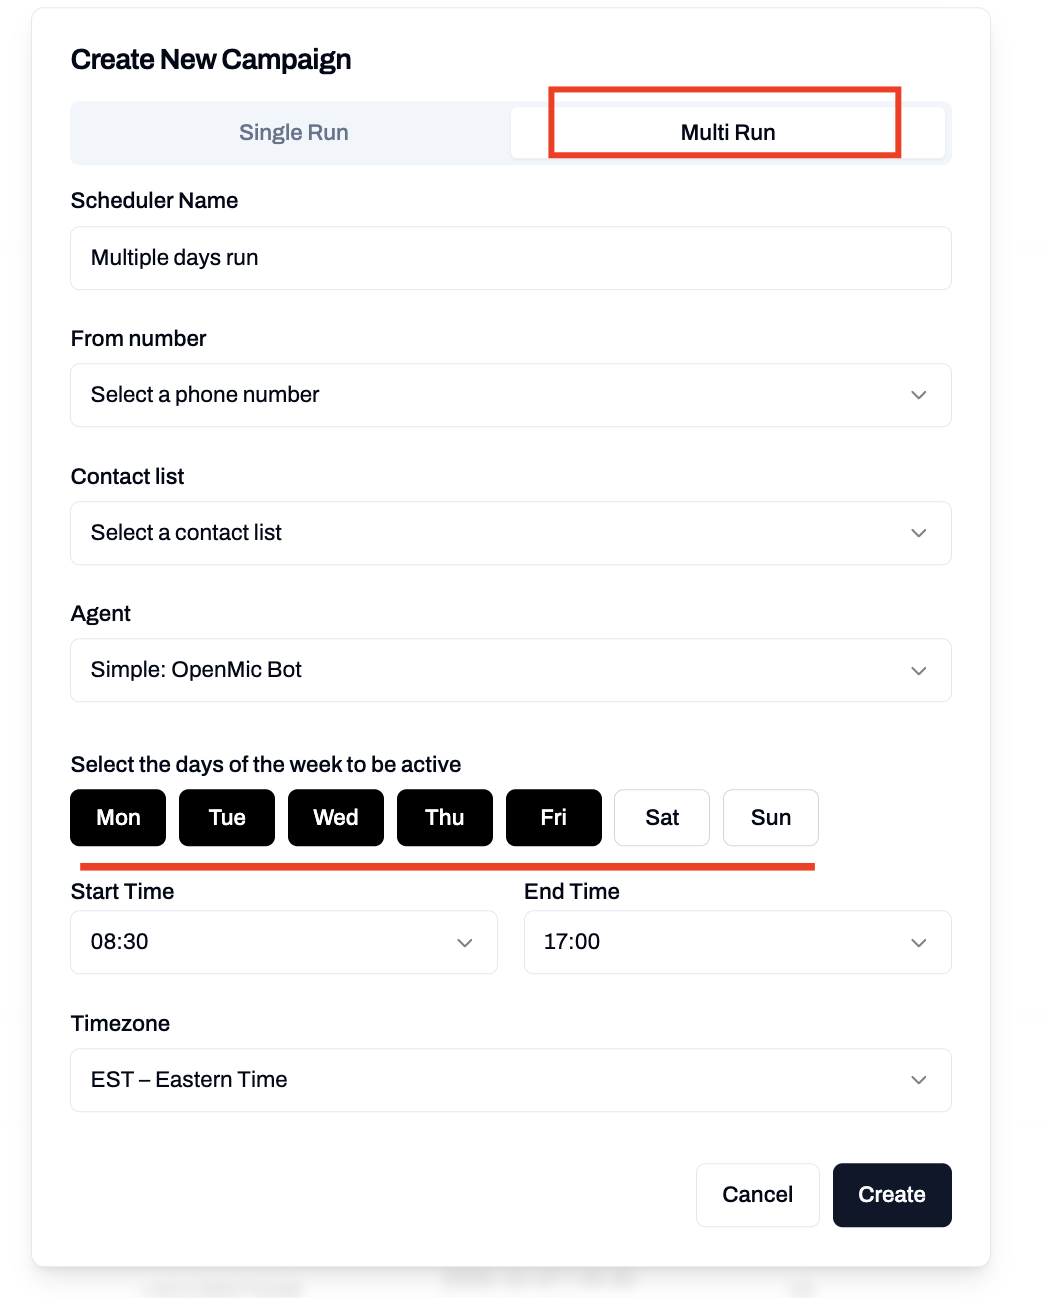 **Multi Run campaigns** are perfect for business hours calling, allowing you to automatically run campaigns on weekdays during specific time windows. The campaign will automatically start and stop based on your configured schedule.
## 6. Run & Monitor Your Campaign
* At the scheduled time, your campaign will begin dialing contacts **in order** from the list.
* Your agent will dynamically insert values from your CSV (e.g., "Hello `{{name}}`, we're calling about your account `{{Account Id}}`").
* You can track performance and outcomes in the **Call Logs** section, where each interaction is recorded.
**Multi Run campaigns** are perfect for business hours calling, allowing you to automatically run campaigns on weekdays during specific time windows. The campaign will automatically start and stop based on your configured schedule.
## 6. Run & Monitor Your Campaign
* At the scheduled time, your campaign will begin dialing contacts **in order** from the list.
* Your agent will dynamically insert values from your CSV (e.g., "Hello `{{name}}`, we're calling about your account `{{Account Id}}`").
* You can track performance and outcomes in the **Call Logs** section, where each interaction is recorded.
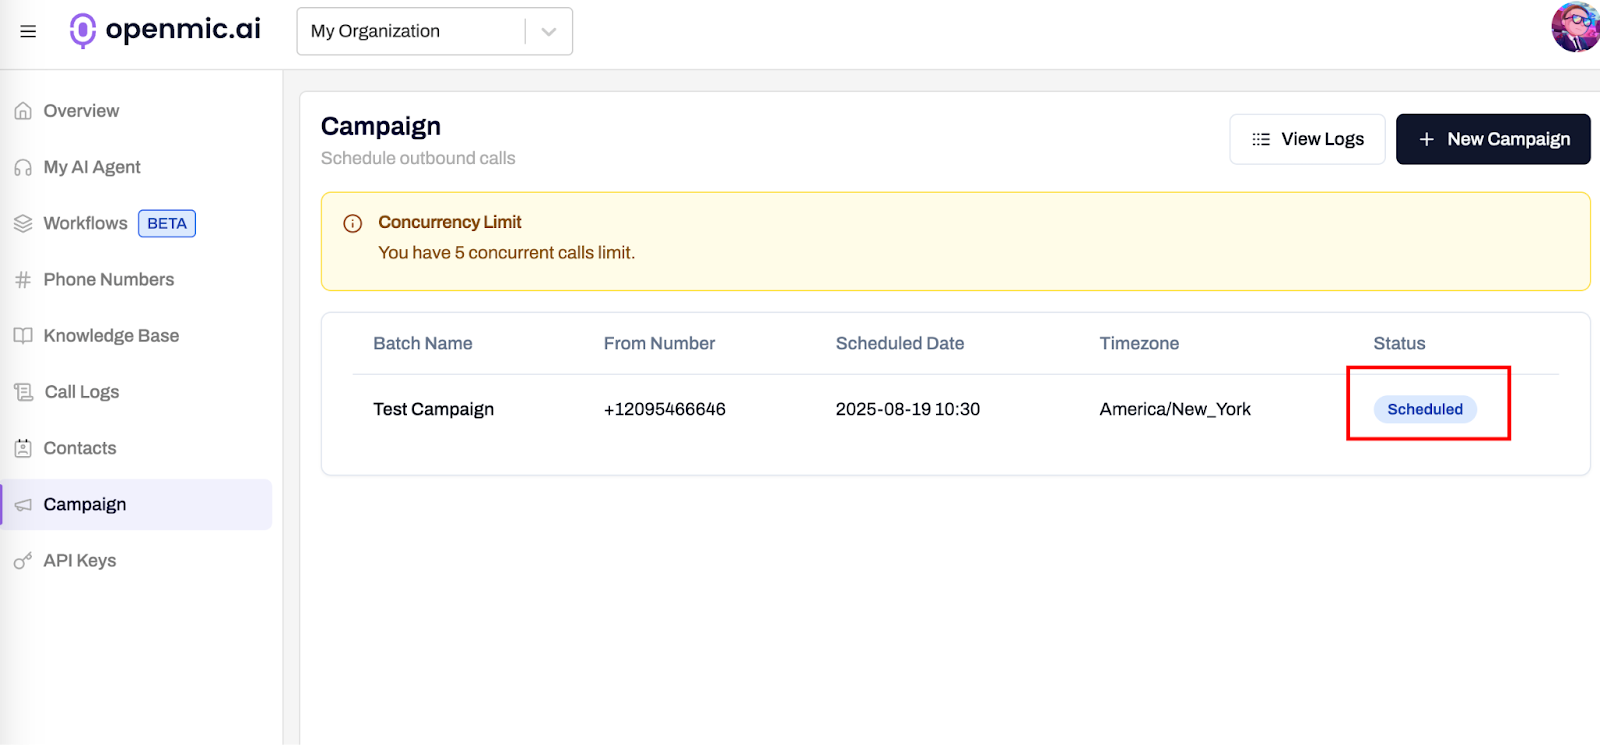 * You can also reschedule the campaign, just click on the campaign and change the date and time.
Unlock full access and see how OpenMic works - free trial available.
* You can also reschedule the campaign, just click on the campaign and change the date and time.
Unlock full access and see how OpenMic works - free trial available.