What is Call Booking?
With Call Booking, your AI agent can automatically schedule appointments in your Cal.com calendar while talking with customers. Example:- Customer: “I’d like to book an appointment for Tuesday at 2 PM”
- AI collects their name and email
- AI creates the booking in your calendar
- Customer gets a confirmation email
- Done! No manual scheduling needed.
🎮 Interactive Demo
Watch how to set up appointment booking:- Simple Agents
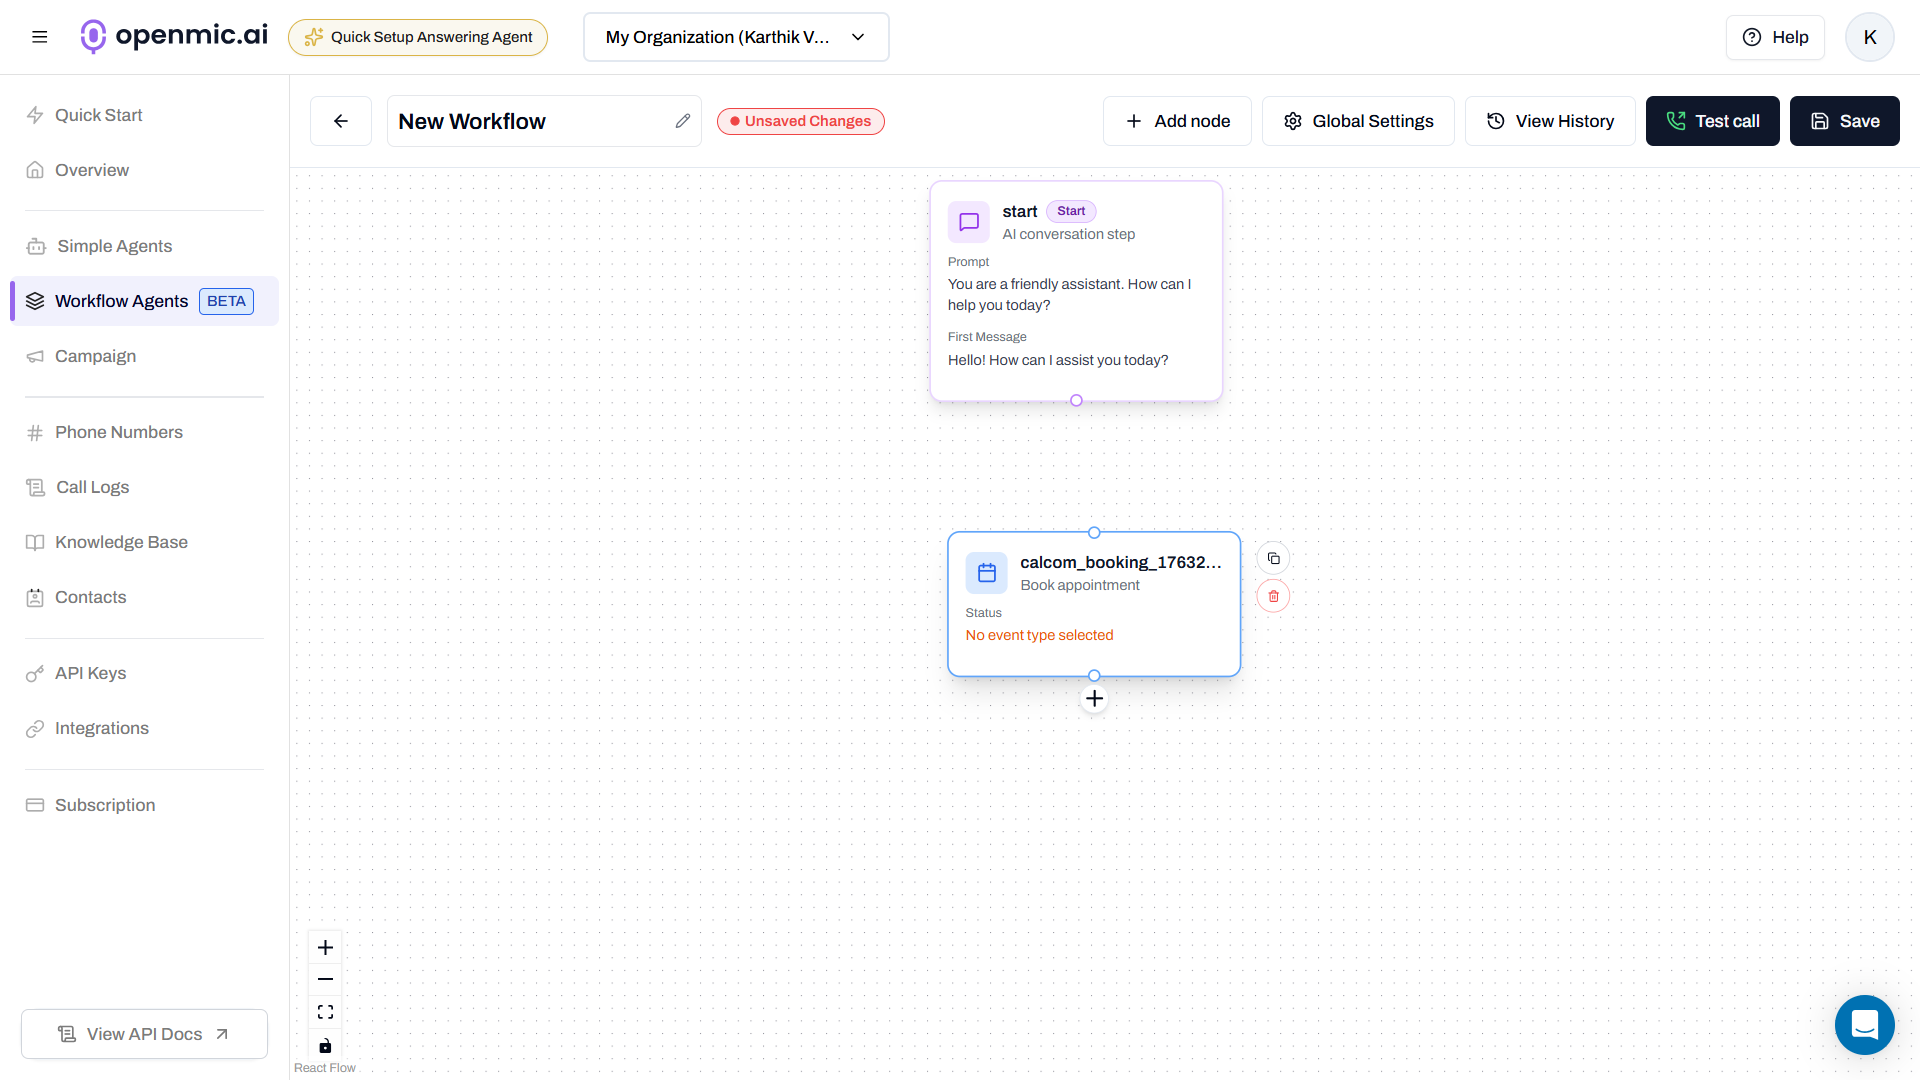
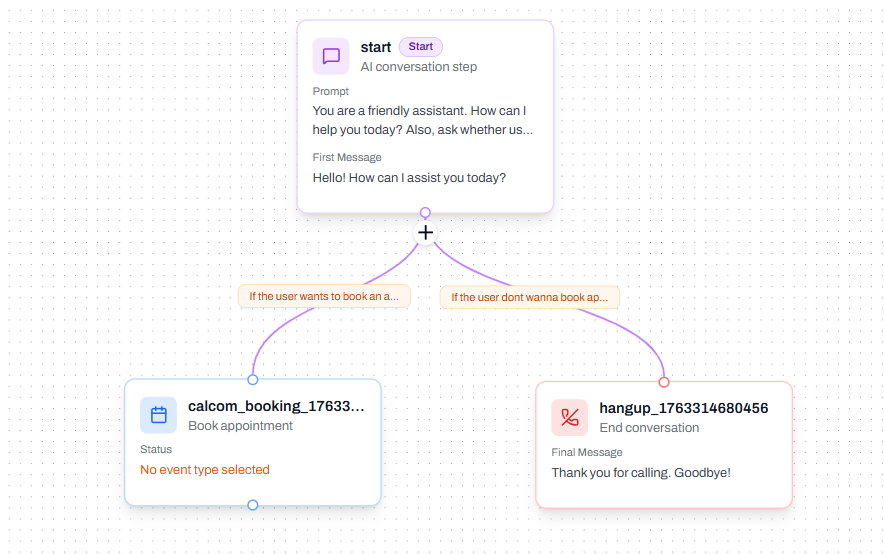
- Workflow Agents
🛠 Step-by-Step Instructions
- Simple Agents
- Workflow Agents
Step 1: Get Your Cal.com Details
Before you start, you’ll need a Cal.com account.What you’ll need:- Your Cal.com username (e.g., if your link is
cal.com/john, your username isjohn)- Find it at your Cal.com profile page
- Or your organization slug (e.g., if your team URL is
acme.cal.com, it’sacme)
First time using Cal.com? Make sure you’ve created at least one event type in your calendar. Go to Event Types and create one (like “30 Minute Meeting”) before continuing.
Step 2: Go to Simple Agents
- Open your OpenMic dashboard
- Click Simple Agents in the sidebar
- Select your agent
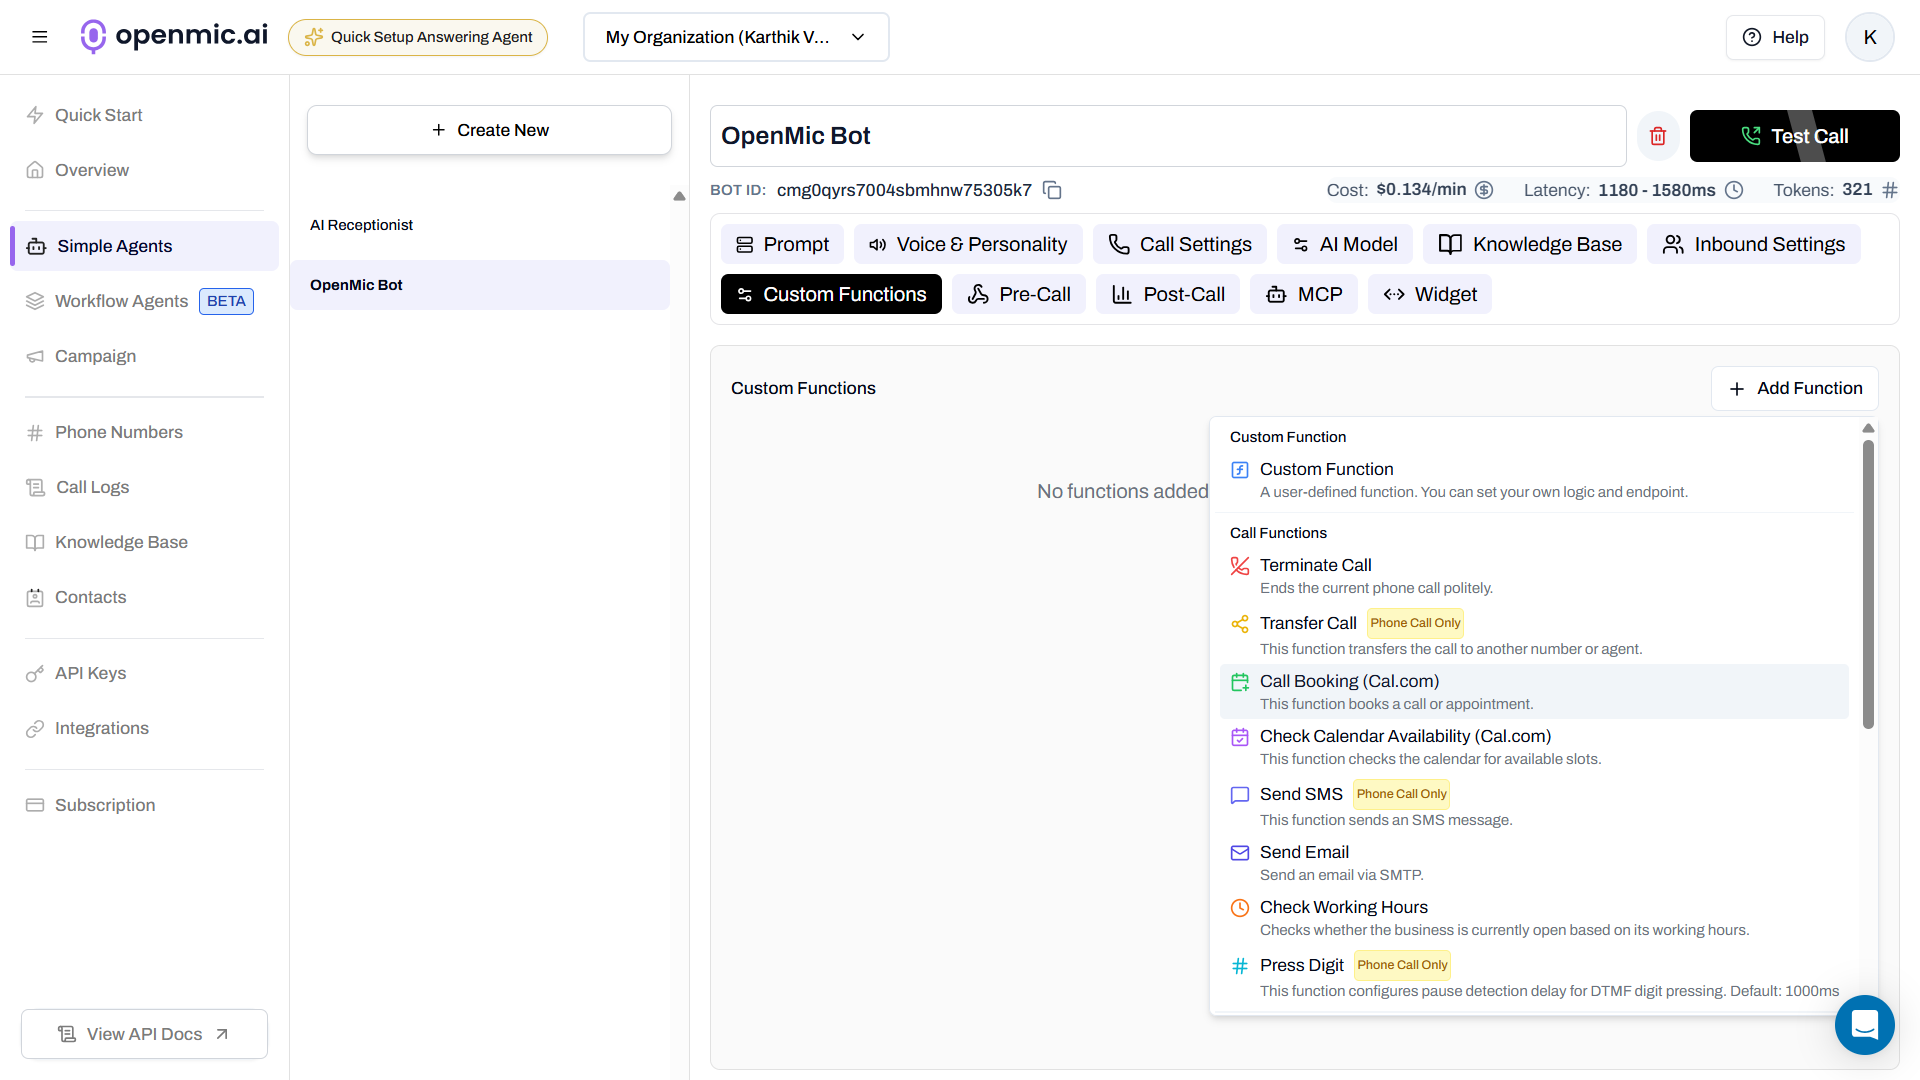
Step 3: Open Custom Functions Tab
Click the Custom Functions tab at the top.Step 4: Add Call Booking Function
- Click Add Function
- Select Call Booking from the list
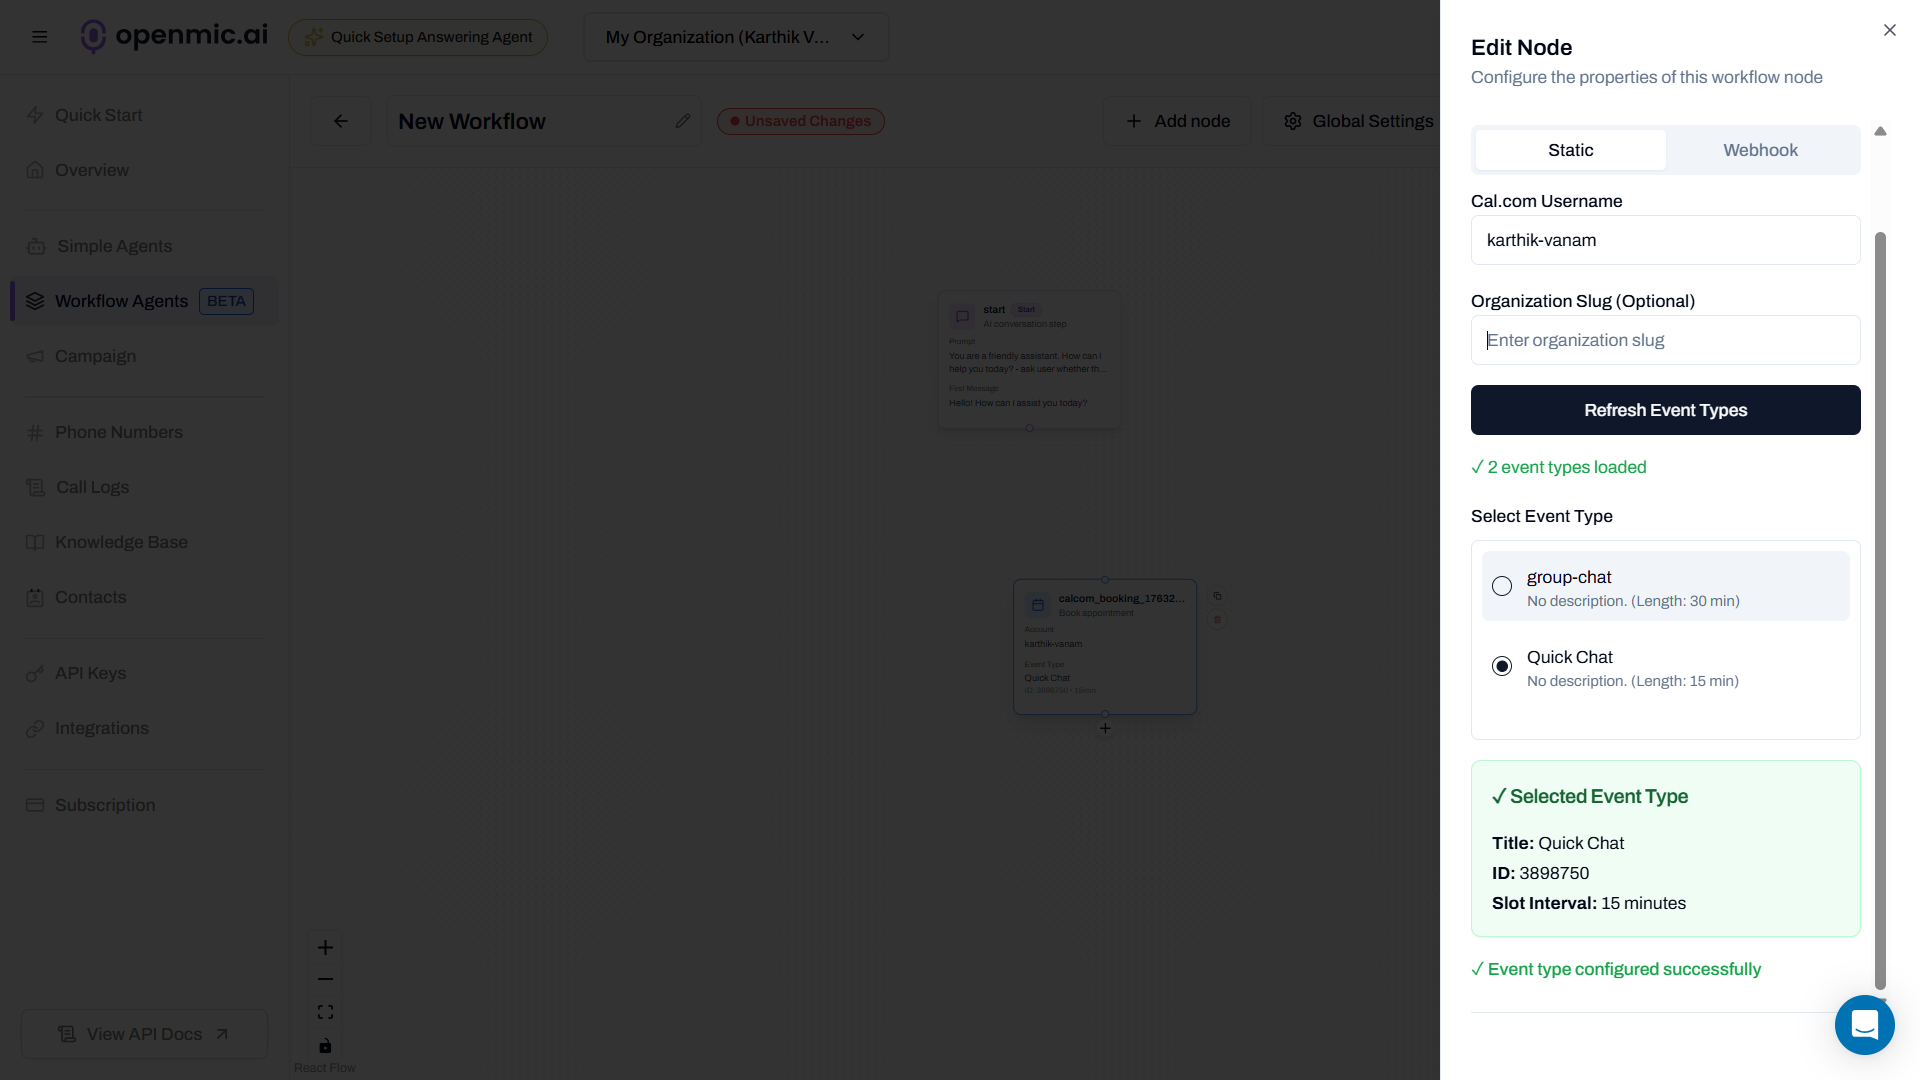
Step 5: Choose Static Mode (Easy Setup)
When the configuration popup appears:- Select Static Mode (no API key needed!)
- Enter your Cal.com username or organization slug
- Click Fetch Event Types
Step 6: Select Your Event Type
You’ll see a dropdown with your calendar types (like “30 Min Meeting”, “Consultation”, etc.)Choose the event type you want to book.What’s an event type?It’s the type of appointment in your Cal.com calendar - like a 30-minute call, 1-hour consultation, etc.Click Next to continue.
Step 7: Configure the Function
Fill in these fields:Function Name:book_appointment(Use underscores, no spaces)Description:
Use this when the customer wants to book an appointmentTimezone (optional): Your timezone like America/New_YorkStep 8: Save the Function
Click Create Function at the bottom.Step 9: Update Your Agent Prompt
Tell your AI when to use the booking function:- Go to the Configuration tab
- Add this to your agent’s prompt:
Step 10: Test It!
- Call your AI agent
- Say: “I’d like to book an appointment for Tuesday at 2 PM”
- AI will ask for your name and email
- AI creates the booking
- You get a confirmation email!
💡 Pro Tip
💡 Quick Reminder
Static mode uses public event types. Make sure your event type is set to “Public” in your Cal.com settings.
What’s Next?
Now that you have basic booking set up, you can:- Add availability checking so customers see open slots first
- Use Webhook Mode for private calendars (requires API key)
- Create multiple booking nodes for different appointment types
Need More?
Full Call Booking Documentation
Explore advanced features like webhook mode, API configuration, and booking for Simple Agents.