Stay Connected: The Send SMS function enables your AI agents to send personalized text messages during conversations, helping you follow up with customers, send confirmations, share links, or deliver important information instantly.
Interactive Demo
See how to set up the Send SMS function for both simple agents and workflow agents:- Simple Agent Demo
- Workflow Agent Demo
Overview
The Send SMS function allows your AI agents to send text messages during conversations. This powerful feature can be used to send appointment confirmations, share links, deliver verification codes, send follow-up information, or any other text-based communication your business needs. Key Benefits:- Send personalized messages based on conversation context
- Share links, confirmations, and important information instantly
- Improve customer engagement with timely text communications
- Automate follow-up messages and reminders
Add Send SMS to Simple Agents
Follow these steps to add the Send SMS function to your AI voice agent:Step 1: Navigate to Simple Agents
From your dashboard sidebar, click on Simple Agents.Step 2: Select Your Agent
Click on the agent you want to configure from the list.Step 3: Open Custom Functions Tab
Click on the Custom Functions tab in the agent configuration.Step 4: Add New Function
Click the Add Function button to open the function selection menu.
Step 5: Select Send SMS
Click on Send SMS from the available functions. A configuration popup will appear.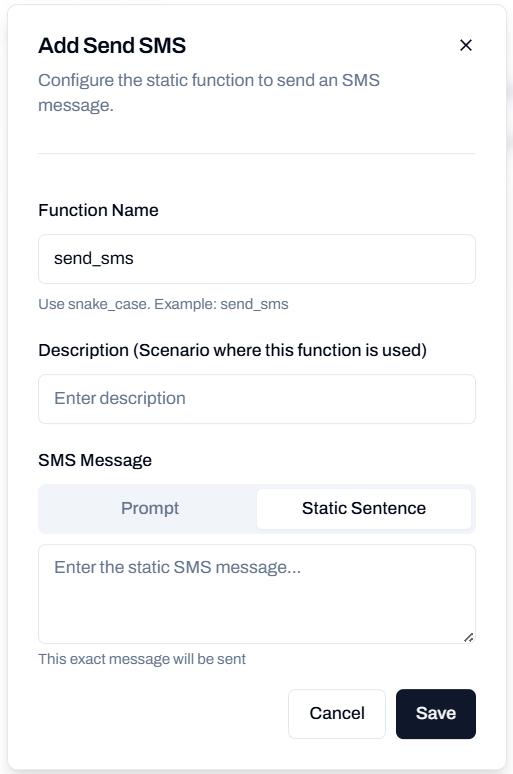
Step 6: Configure the Function
Fill in the required fields:Function Name
Give your function a descriptive name (e.g., “Send Appointment Confirmation”, “Send Link”, “Send Verification Code”).Description
Describe when this function should be used. This helps the AI understand when to trigger the SMS. Examples:- “Use this when the customer requests an appointment confirmation via text”
- “Send this when the customer asks for the link to our website”
- “Use this when the customer needs their verification code”
SMS Message
Choose how the message should be generated:- Prompt
- Static
Use AI-generated messages based on the conversation context.How it works:
- The AI composes the SMS dynamically based on the conversation
- Can adapt based on customer information and context
- More flexible and contextual
Step 7: Save the Function
Click Save to add the Send SMS function to your agent.Once saved, your AI agent will be able to use this function during conversations when the conditions you described are met.
Add Send SMS to Workflow Agents
Follow these steps to add the Send SMS function to your workflow agent:Step 1: Navigate to Workflow Agents
From your dashboard sidebar, click on Workflow Agents.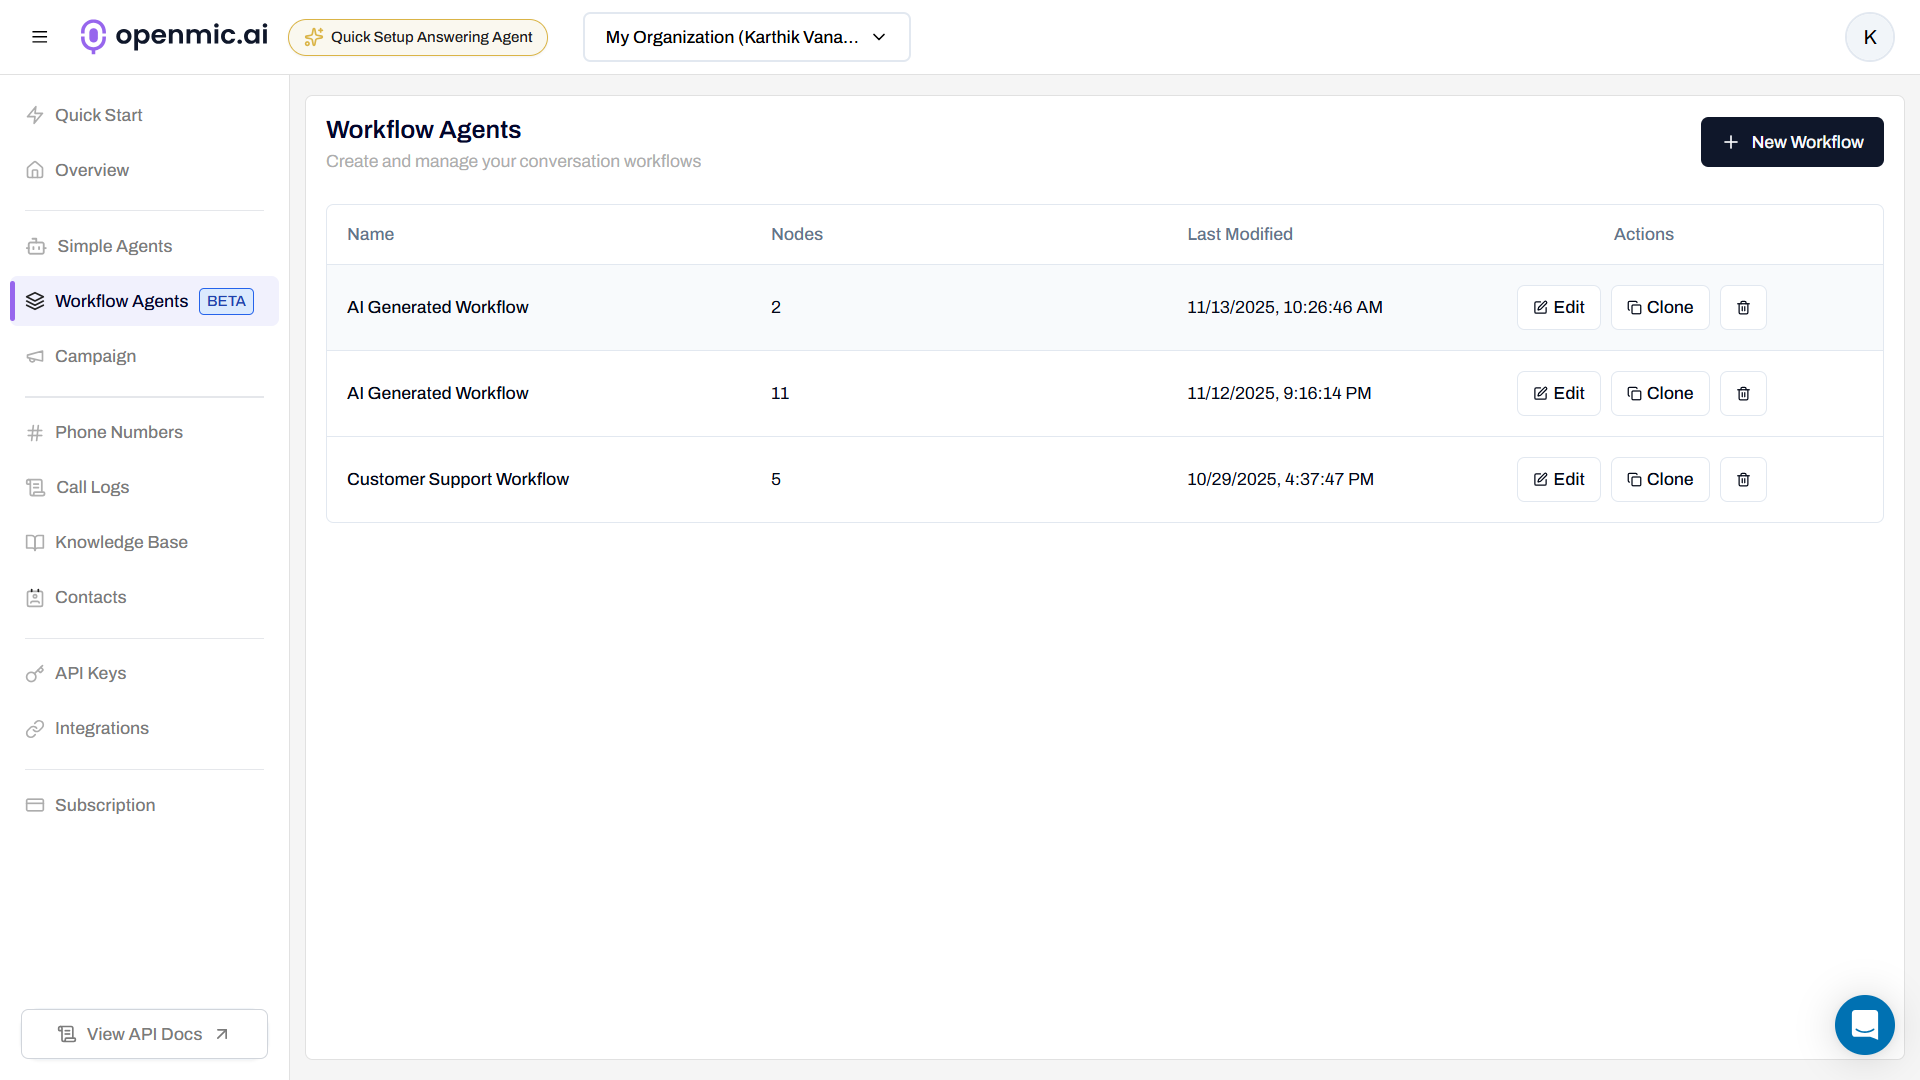
Step 2: Select Your Workflow
Click on the workflow you want to configure from the list.Step 3: Add SMS Node
In the workflow editor, click the Add Node button (usually a ”+” icon) where you want to add the SMS step.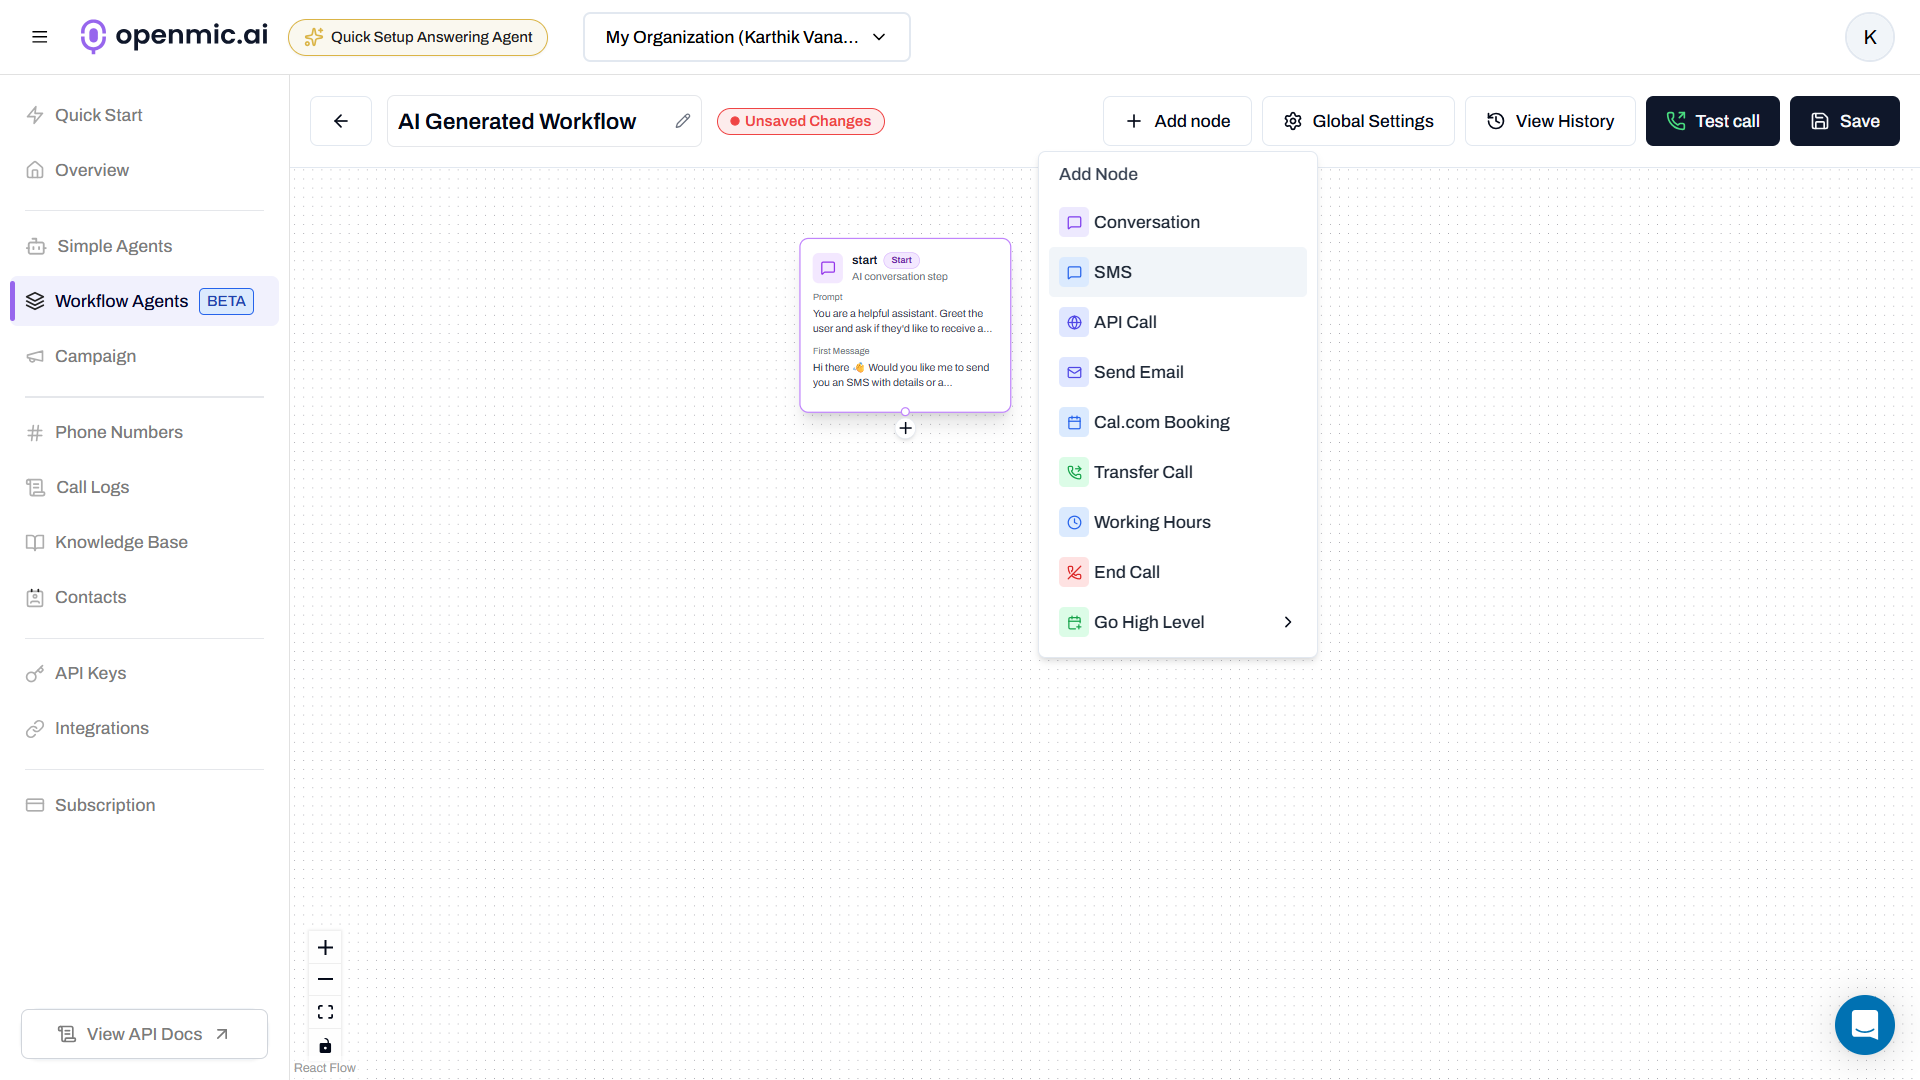
Step 4: Select SMS Node
From the node types, click on SMS to add an SMS node to your workflow.Step 5: Configure the SMS Node
Click on the newly added SMS node to open its configuration panel.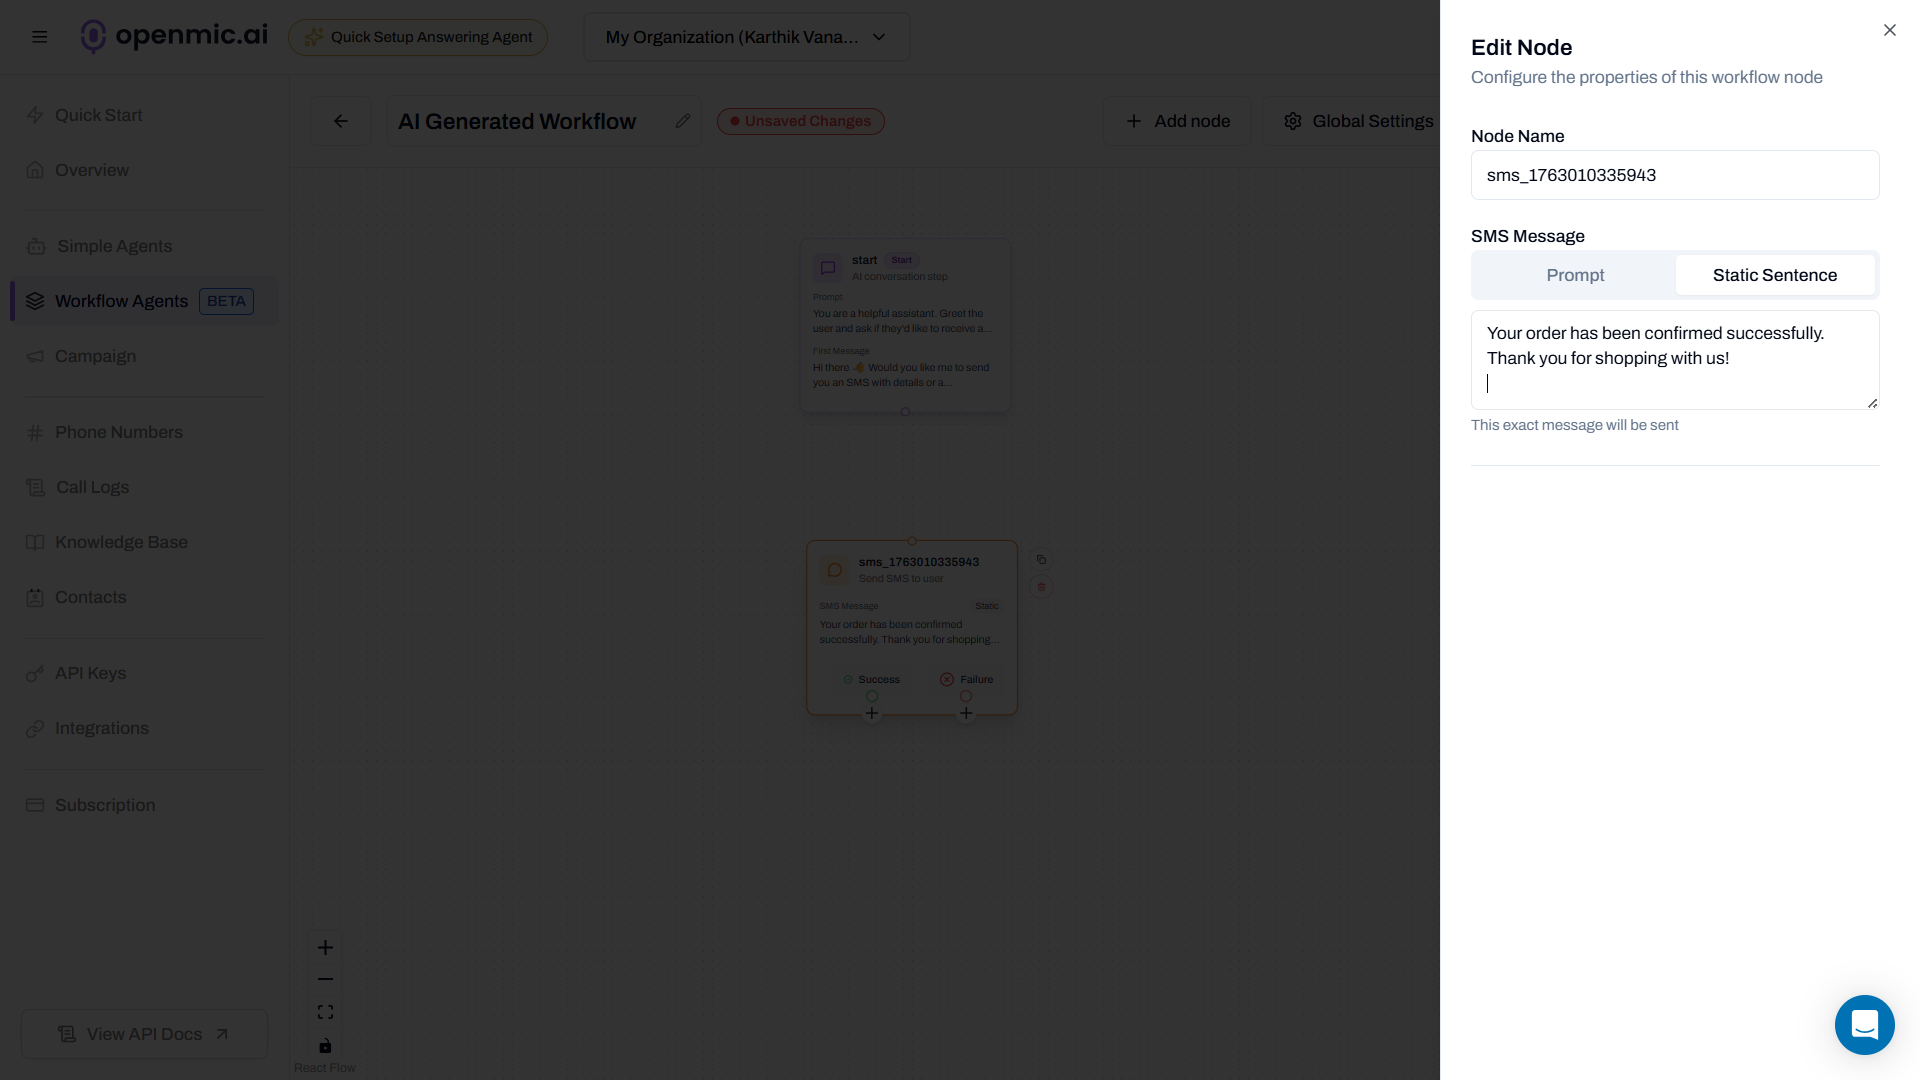
Function Name
Give your SMS step a descriptive name (e.g., “Send Welcome SMS”, “Send Confirmation”, “Send Follow-up”).SMS Message
Choose how the message should be generated:- Prompt
- Static
Use AI-generated messages based on the workflow context and variables.How it works:
- The AI composes the SMS dynamically
- Can incorporate workflow variables and context
- More flexible and personalized
Step 6: Save the Workflow
Click the Save button in the top right corner of the workflow editor to apply your changes.The SMS will be sent when the workflow execution reaches this node during the call or process flow.
Configuration Best Practices
Keep Messages Concise
Keep Messages Concise
- SMS has a 160-character limit per segment
- Keep messages brief and to the point
- Focus on the most important information
- Use clear, simple language
Write Clear Function Descriptions
Write Clear Function Descriptions
For Simple Agents, write clear descriptions that help the AI understand when to trigger the SMS:
- Be specific about the trigger condition
- Mention key phrases or scenarios
- Avoid ambiguous language
Use Dynamic Content Wisely
Use Dynamic Content Wisely
When using Prompt mode:
- Clearly specify what information to include
- Test with different conversation scenarios
- Ensure the AI has access to necessary context
- Verify the generated messages make sense
Test Your SMS Function
Test Your SMS Function
- Test the function with your own phone number first
- Verify messages are clear and complete
- Check that links and formatting work correctly
- Test with different conversation flows
- Ensure timing is appropriate in workflows
Include Important Information
Include Important Information
Make sure your SMS messages include:
- Your business or agent name
- The purpose of the message
- Any required actions or next steps
- Links if applicable (use URL shorteners for long links)
Respect Opt-Out Preferences
Respect Opt-Out Preferences
- Ensure you have consent to send SMS messages
- Include opt-out instructions for marketing messages
- Follow SMS compliance regulations (TCPA, GDPR, etc.)
- Honor customer communication preferences
Use Cases and Examples
Appointment Confirmations
Appointment Confirmations
Scenario: Customer books an appointment during the callFunction Description:
“Use this when a customer books an appointment and requests a text confirmation”SMS Message (Prompt):
“Send an SMS confirming the appointment with the date, time, and location we discussed”SMS Message (Static):
Share Links or Resources
Share Links or Resources
Verification Codes
Verification Codes
Scenario: Customer needs a verification or reference codeFunction Description:
“Use this when the customer needs their verification code or reference number”SMS Message (Prompt):
“Send an SMS with the verification code or reference number from the system”
Follow-up Information
Follow-up Information
Scenario: Sending additional information after the callFunction Description:
“Use this when the customer requests additional information to be sent via text”SMS Message (Prompt):
“Send a follow-up SMS with the information the customer requested during the call”
Order or Service Updates
Order or Service Updates
Scenario: Workflow sends updates at specific stagesWorkflow Use Case:
Add an SMS node after order confirmation or service completionSMS Message (Static):
Frequently Asked Questions
How do I know if the SMS was sent successfully?
How do I know if the SMS was sent successfully?
You can check your call logs and workflow execution history to see if the SMS function was triggered and whether it was sent successfully. Delivery status will be indicated in the logs.
What happens if the customer's phone number is invalid?
What happens if the customer's phone number is invalid?
The system will log an error, and the SMS will not be sent. You can review failed attempts in your call logs and analytics.
Can I send SMS to multiple numbers?
Can I send SMS to multiple numbers?
Each Send SMS function sends to one phone number (typically the customer’s number from the call). To send to multiple numbers, you would need to add multiple SMS nodes in a workflow or create multiple function calls.
Are there character limits for SMS messages?
Are there character limits for SMS messages?
Standard SMS messages have a 160-character limit per segment. Longer messages will be split into multiple segments. Keep messages concise for the best delivery experience.
Can I update an SMS function after creating it?
Can I update an SMS function after creating it?
Yes, you can edit the function configuration at any time. For Simple Agents, go to the Custom Functions tab and edit the function. For Workflows, click on the SMS node to edit its configuration.
Difference: Simple Agents vs Workflow Agents
Simple Agents
When to Use:
- Dynamic, conversation-based SMS sending
- AI decides when to send based on conversation flow
- Multiple SMS functions for different scenarios
- Agent uses AI to determine when conditions are met
- Triggered by conversation context and customer requests
- More flexible and adaptive
Workflow Agents
When to Use:
- Predetermined process with specific SMS steps
- SMS sent at specific points in the workflow
- Automated, predictable messaging
- SMS sent when workflow execution reaches the node
- Part of a structured, sequential process
- More controlled and predictable
Need Help?
If you encounter issues or have questions about the Send SMS function:- Test the function with your own phone number first
- Review your call logs and workflow execution history
- Verify the phone number format is correct
- Check that your SMS function description is clear (for Simple Agents)
- Ensure your workflow is saved and published (for Workflow Agents)
For technical support or questions about SMS compliance, contact our support team.